Thursday, October 03, 2013 Eric Richards

So far, we have either worked with procedurally generated meshes, like our boxes and cylinders, or loaded very simple text-based mesh formats.  For any kind of real application, however, we will need to have the capability to load meshes created by artists using 3D modeling and animation programs, like Blender or 3DS Max.  There are a number of potential solutions to this problem; we could write an importer to read the specific file format of the program we are most likely to use for our engine.  This does present a new host of problems, however: unless we write another importer, we are limited to just using models created with that modeling software, or we will have to rely on or create plugins to our modeling software to reformat models created using different software.  There is a myriad of different 3D model formats in more-or-less common use, some of which are open-source, some of which are proprietary; many of both are surprisingly hard to find good, authoritative documentation on.  All this makes the prospects of creating a general-purpose, cross-format model importer a daunting task.

Fortunately, there exists an open-source library with support for loading most of the commonly used model formats, ASSIMP, or Open Asset Import Library.  Although Assimp is written in C++, there exists a port for .NET, AssimpNet, which we will be able to use directly in our code, without the hassle of wrapping the native Assimp library ourselves.  I am not a lawyer, but it looks like both the Assimp and AssimpNet have very permissive licenses that should allow one to use them in any kind of hobby or professional project.

While we can use Assimp to load our model data, we will need to create our own C# model class to manage and render the model.  For that, I will be following the example of Chapter 23 of Frank Luna’s Introduction to 3D Game Programming with Direct3D 11.0 .  This example will not be a straight conversion of his example code, since I will be ditching the m3d model format which he uses, and instead loading models from the standard old Microsoft DirectX X format.  The models I will be using come from the example code for Chapter 4 of Carl Granberg’s Programming an RTS Game with Direct3D , although you may use any of the supported Assimp model formats if you want to use other meshes instead.  The full source for this example can be found on my GitHub repository, at https://github.com/ericrrichards/dx11.git, under the AssimpModel project.

image


Tuesday, October 01, 2013 Eric Richards

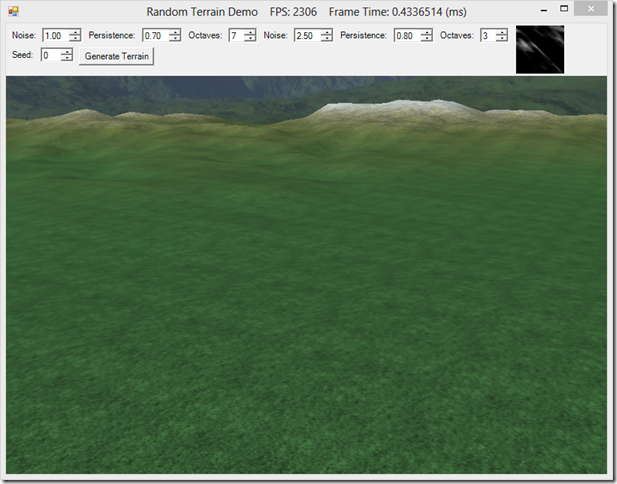
Previously, we have used our Terrain class solely with heightmaps that we have loaded from a file.  Now, we are going to extend our Terrain class to generate random heightmaps as well, which will add variety to our examples.  We will be using Perlin Noise, which is a method of generating naturalistic pseudo-random textures developed by Ken Perlin.  One of the advantages of using Perlin noise is that its output is deterministic; for a given set of control parameters, we will always generate the same noise texture.  This is desirable for our terrain generation algorithm because it allows us to recreate the same heightmap given the same initial seed value and control parameters.

Because we will be generating random heightmaps for our terrain, we will also need to generate an appropriate blendmap to texture the resulting terrain.  We will be using a simple method that assigns the different terrain textures based on the heightmap values; a more complex simulation might model the effects of weather, temperature and moisture to assign diffuse textures, but simply using the elevation works quite well with the texture set that we are using.

The code for this example is heavily influenced by Chapter 4 of Carl Granberg’s Programming an RTS Game with Direct3D , adapted into C# and taking advantage of some performance improvements that multi-core CPUs on modern computers offer us.  The full code for this example can be found on my GitHub repository, at https://github.com/ericrrichards/dx11.git, under the RandomTerrainDemo project.  In addition to the random terrain generation code, we will also look at how we can add Windows Forms controls to our application, which we will use to specify the parameters to use to create the random terrain.

random1


Monday, September 30, 2013 Eric Richards

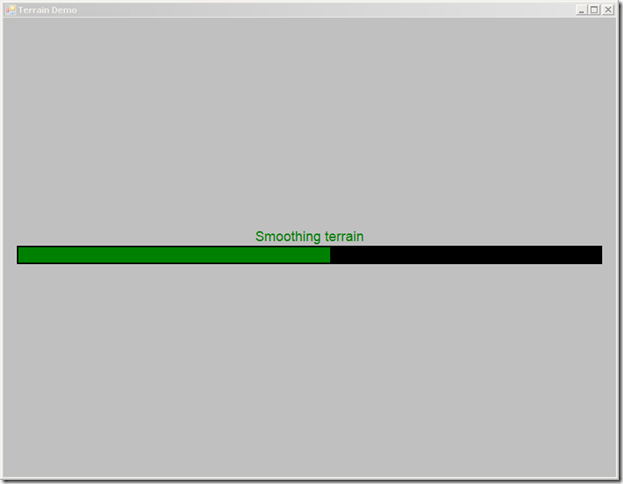
I know that I have been saying that I will cover random terrain generation in my next post for several posts now, and if all goes well, that post will be published today or tomorrow.  First, though, we will talk about Direct2D, and using it to draw a loading screen, which we will display while the terrain is being generated to give some indication of the progress of our terrain generation algorithm.

Direct2D is a new 2D rendering API from Microsoft built on top of DirectX 10 (or DirectX 11 in Windows 8).  It provides functionality for rendering bitmaps, vector graphics and text in screen-space using hardware acceleration.  It is positioned as a successor to the GDI rendering interface, and, so far as I can tell, the old DirectDraw API from earlier versions of DirectX.  According to the documentation, it should be possible to use Direct2D to render 2D elements to a Direct3D 11 render target, although I have had some difficulties in actually getting that use-case to work.  It does appear to work excellently for pure 2D rendering, say for menu or loading screens, with a simpler syntax than using Direct3D with an orthographic projection.

We will be adding Direct2D support to our base application class D3DApp, and use Direct2D to render a progress bar with some status text during our initialization stage, as we load and generate the Direct3D resources for our scene.  Please note that the implementation presented here should only be used while there is no active Direct3D rendering occurring; due to my difficulties in getting Direct2D/Direct3D interoperation to work correctly, Direct2D will be using a different backbuffer than Direct3D, so interleaving Direct2D drawing with Direct3D rendering will result in some very noticeable flickering when the backbuffers switch.

The inspiration for this example comes from Chapter 5 of Carl Granberg’s Programming an RTS Game with Direct3D , where a similar Progress screen is implemented using DirectX9 and the fixed function pipeline.  With the removal of the ID3DXFont interface from newer versions of DirectX, as well as the lack of the ability to clear just a portion of a DirectX11 DeviceContext’s render target, a straight conversion of that code would require some fairly heavy lifting to implement in Direct3D 11, and so we will be using Direct2D instead.  The full code for this example can be found on my GitHub repository, at https://github.com/ericrrichards/dx11.git, and is implemented in the TerrainDemo and RandomTerrainDemo projects.

progressBar


Thursday, September 26, 2013 Eric Richards

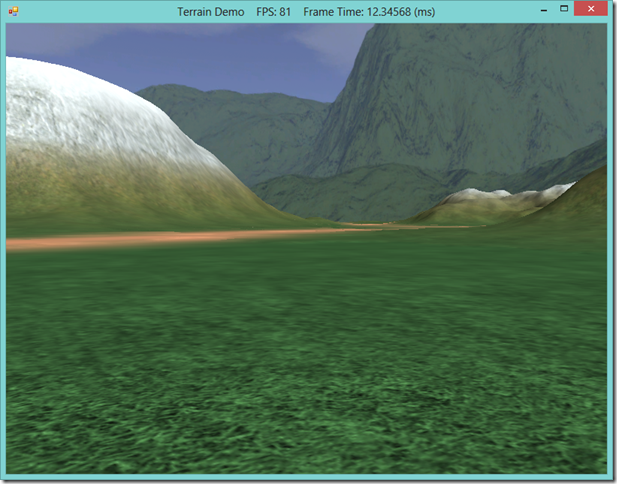
Last time, we discussed terrain rendering, using the tessellation stages of the GPU to render the terrain mesh with distance-based LOD.  That method required a DX11-compliant graphics card, since the Hull and Domain shader stages are new to Direct3D11.  According to the latest Steam Hardware survey, nearly 65% of gamers have a DX11 graphics card, which is certainly the majority of potential users, and only likely to increase in the future.  Of the remaining 35% of gamers, 31% are still using DX10 graphics cards.  While we can safely ignore the small percentage of the market that is still limping along on DX9 cards (I myself still have an old laptop with a GeForce Go 7400 in my oldest laptop, but that machine is seven years old and on its last legs), restricting ourselves to only DX 11 cards cuts out a third of potential users of your application.  For that reason, I’m going to cover an alternative, CPU-based implementation of our previous LOD terrain rendering example.  If you have the option, I would suggest that you only bother with the previous DX11 method, as tessellating the terrain mesh yourself on the CPU is relatively more complex, prone to error, less performant, and produces a somewhat lower quality result; if you must support DX10 graphics cards, however, this method or one similar to it will do the job, while the hull/domain shader method will not.

We will be implementing this rendering method as an additional render path in our Terrain class, if we detect that the user has a DX10 compatible graphics card.  This allows us to reuse a large chunk of the previous code.  For the rest, we will adapt portions of the HLSL shader code that we previously implemented into C#, as well as use some inspirations from Chapter 4 of Carl Granberg’s Programming an RTS Game with Direct3D .  The full code for this example can be found at my GitHub repository, https://github.com/ericrrichards/dx11.git, under the TerrainDemo project.

dx10-terrain


Saturday, September 21, 2013 Eric Richards

A common task for strategy and other games with an outdoor setting is the rendering of the terrain for the level.  Probably the most convenient way to model a terrain is to create a triangular grid, and then perturb the y-coordinates of the vertices to match the desired elevations.  This elevation data can be determined by using a mathematical function, as we have done in our previous examples, or by sampling an array or texture known as a heightmap.  Using a heightmap to describe the terrain elevations allows us more fine-grain control over the details of our terrain, and also allows us to define the terrain easily, either using a procedural method to create random heightmaps, or by creating an image in a paint program.

Because a terrain can be very large, we will want to optimize the rendering of it as much as possible.  One easy way to save rendering cycles is to only draw the vertices of the terrain that can be seen by the player, using frustum culling techniques similar to those we have already covered.  Another way is to render the mesh using a variable level of detail, by using the Hull and Domain shaders to render the terrain mesh with more polygons near the camera, and fewer in the distance, in a manner similar to that we used for our Displacement mapping effect.  Combining the two techniques allows us to render a very large terrain, with a very high level of detail, at a high frame rate, although it does limit us to running on DirectX 11 compliant graphics cards.

We will also use a technique called texture splatting to render our terrain with multiple textures in a single rendering call.  This technique involves using a separate texture, called a blend map, in addition to the diffuse textures that are applied to the mesh, in order to define which texture is applied to which portion of the mesh. 

The code for this example was adapted from Chapter 19 of Frank Luna’s Introduction to 3D Game Programming with Direct3D 11.0 , with some additional inspirations from Chapter 4 of Carl Granberg’s Programming an RTS Game with Direct3D .  The full source for this example can be downloaded from my GitHub repository, at https://github.com/ericrrichards/dx11.git, under the TerrainDemo project.

image