Friday, August 30, 2013 Eric Richards

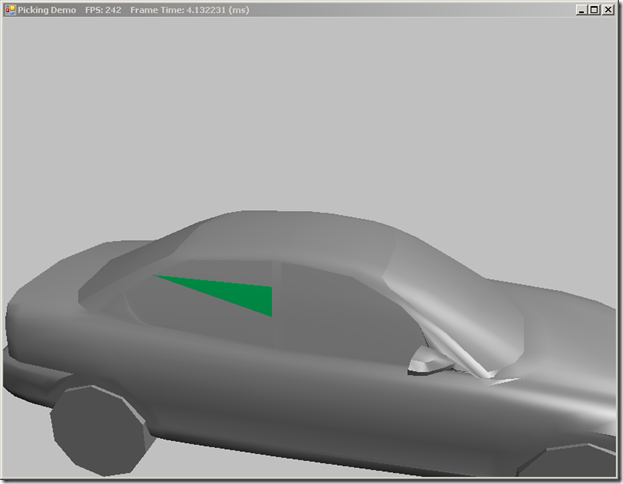
So far, we have only been concerned with drawing a 3D scene to the 2D computer screen, by projecting the 3D positions of objects to the 2D pixels of the screen.  Often, you will want to perform the reverse operation; given a pixel on the screen, which object in the 3D scene corresponds to that pixel?  Probably the most common application for this kind of transformation is selecting and moving objects in the scene using the mouse, as in most modern real-time strategy games, although the concept has other applications.

The traditional method of performing this kind of object picking relies on a technique called ray-casting.  We shoot a ray from the camera position through the selected point on the near-plane of our view frustum, which is obtained by converting the screen pixel location into normalized device coordinates, and then intersect the resulting ray with each object in our scene.  The first object intersected by the ray is the object that is “picked.” 

The code for this example is based on Chapter 16 of Frank Luna’s Introduction to 3D Game Programming with Direct3D 11.0 , with some modifications.  You can download the full source from my GitHub repository at https://github.com/ericrrichards/dx11.git, under the PickingDemo project.

Picking


Thursday, August 29, 2013 Eric Richards

Today, we are going to reprise our Camera class from the Camera Demo.  In addition to the FPS-style camera that we have already implemented, we will create a Look-At camera, a camera that remains focused on a point and pans around its target.  This camera will be similar to the very basic camera we implemented for our initial examples (see the Colored Cube Demo).  While our FPS camera is ideal for first-person type views, the Look-At camera can be used for third-person views, or the “birds-eye” view common in city-builder and strategy games.  As part of this process, we will abstract out the common functionality that all cameras will share from our FPS camera into an abstract base camera class.

The inspiration for this example come both from Mr. Luna’s Camera Demo (Chapter 14 of Frank Luna’s Introduction to 3D Game Programming with Direct3D 11.0 ), and the camera implemented in Chapter 5 of Carl Granberg’s Programming an RTS Game with Direct3D .  You can download the full source for this example from my GitHub repository at https://github.com/ericrrichards/dx11.git under the CameraDemo project.  To switch between the FPS and Look-At camera, use the F(ps) and L(ook-at) keys on your keyboard.

lookat


Wednesday, August 28, 2013 Eric Richards

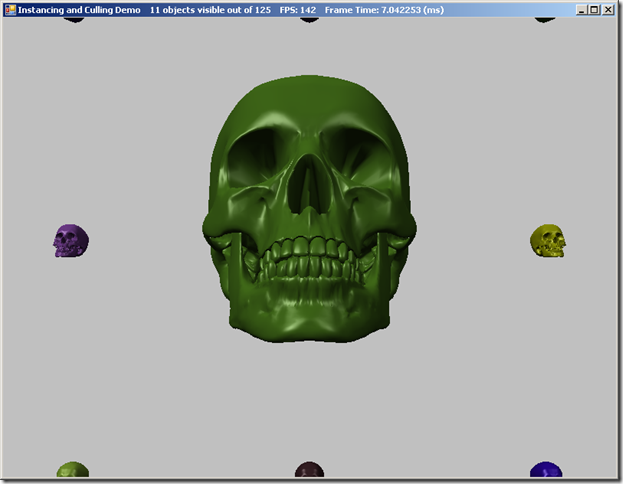
One of the main bottlenecks to the speed of a Direct3D application is the number of Draw calls that are issued to the GPU, along with the overhead of switching shader constants for each object that is drawn.  Today, we are going to look at two methods of optimizing our drawing code.  Hardware instancing allows us to minimize the overhead of drawing identical geometry in our scene, by batching the draw calls for our objects and utilizing per-instance data to avoid the overhead in uploading our per-object world matrices.  Frustum culling enables us to determine which objects will be seen by our camera, and to skip the Draw calls for objects that will be clipped by the GPU during projection.  Together, the two techniques reap a significant increase in frame rate.

The source code for this example was adapted from the InstancingAndCulling demo from Chapter 15 of Frank Luna’s Introduction to 3D Game Programming with Direct3D 11.0 .  Additionally, the frustum culling code for this example was adapted from Chapter 5 of Carl Granberg’s Programming an RTS Game with Direct3D (Luna’s implementation of frustum culling relied heavily on xnacollision.h, which isn’t really included in the base SlimDX).  You can download the full source for this example from my GitHub repository at https://github.com/ericrrichards/dx11.git under the InstancingAndCulling project.

instancing_and_culling


Wednesday, August 21, 2013 Eric Richards

Up until now, we have been using a fixed, orbiting camera to view our demo applications.  This style of camera works adequately for our purposes, but for a real game project, you would probably want a more flexible type of camera implementation.  Additionally, thus far we have been including our camera-specific code directly in our main application classes, which, again, works, but does not scale well to a real game application.  Therefore, we will be splitting out our camera-related code out into a new class (Camera.cs) that we will add to our Core library.  This example maps to the CameraDemo example from Chapter 14 of Frank Luna’s Introduction to 3D Game Programming with Direct3D 11.0 .  The full code for this example can be downloaded from my GitHub repository, https://github.com/ericrrichards/dx11.git, under the CameraDemo project.

We will be implementing a traditional First-Person style camera, as one sees in many FPS’s and RPG games.  Conceptually, we can think of this style of camera as consisting of a position in our 3D world, typically located as the position of the eyes of the player character, along with a vector frame-of-reference, which defines the direction the character is looking.  In most cases, this camera is constrained to only rotate about its X and Y axes, thus we can pitch up and down, or yaw left and right.  For some applications, such as a space or aircraft simulation, you would also want to support rotation on the Z (roll) axis.  Our camera will support two degrees of motion; back and forward in the direction of our camera’s local Z (Look) axis, and left and right strafing along our local X (Right) axis.  Depending on your game type, you might also want to implement methods to move the camera up and down on its local Y axis, for instance for jumping, or climbing ladders.  For now, we are not going to implement any collision detection with our 3D objects; our camera will operate very similarly to the Half-Life or Quake camera when using the noclip cheat.

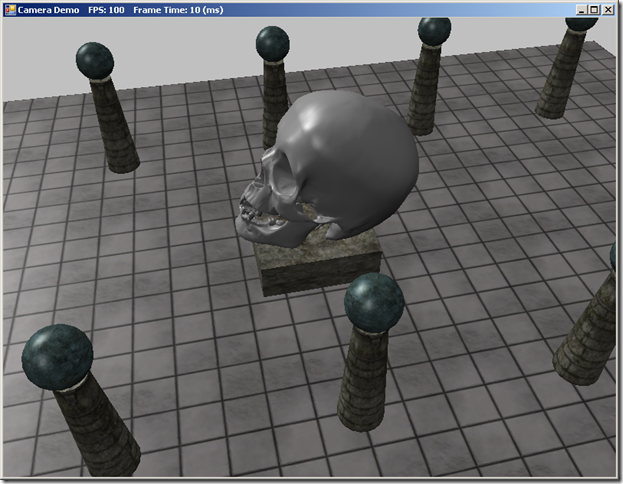
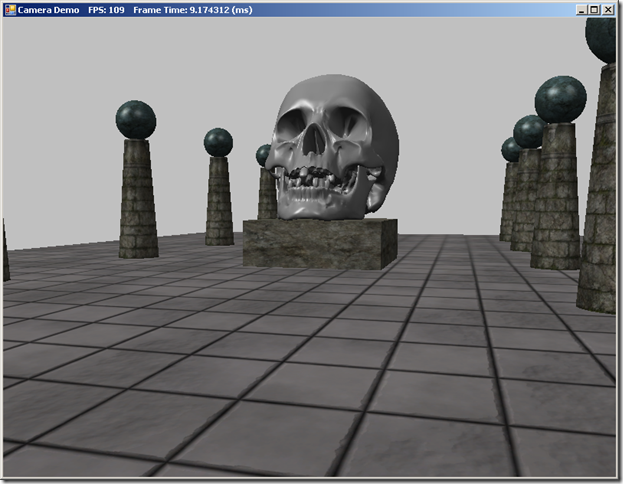
Our camera class will additionally manage its view and projection matrices, as well as storing information that we can use to extract the view frustum.  Below is a screenshot of our scene rendered using the viewpoint of our Camera class (This scene is the same as our scene from the LitSkull Demo, with textures applied to the shapes).

camera


Friday, August 16, 2013 Eric Richards

When I first learned about programming DirectX using shaders, it was back when DirectX 9 was the newest thing around.  Back then, there were only two stages in the shader pipeline, the Vertex and Pixel shaders that we have been utilizing thus far.  DirectX 10 introduced the geometry shader, which allows us to modify entire geometric primitives on the hardware, after they have gone through the vertex shader.

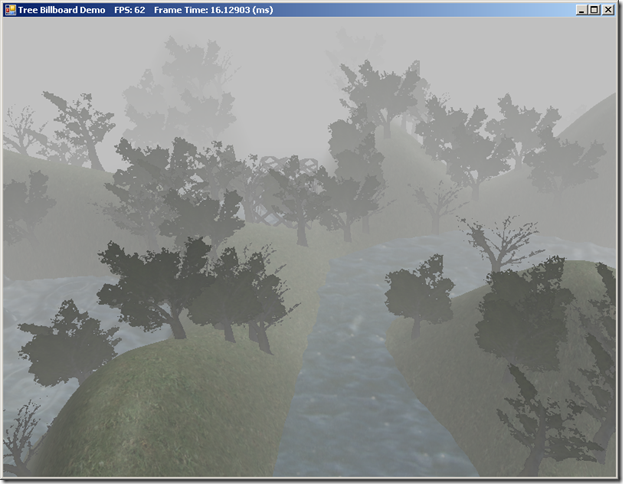
One application of this capability is rendering billboards.  Billboarding is a common technique for rendering far-off objects or minor scene details, by replacing a full 3D object with a texture drawn to a quad that is oriented towards the viewer.  This is much less performance-intensive, and for far-off objects and minor details, provides a good-enough approximation.  As an example, many games use billboarding to render grass or other foliage, and the Total War series renders far-away units as billboard sprites (In Medieval Total War II, you can see this by zooming in and out on a unit; at a certain point, you’ll see the unit “pop”, which is the point where the Total War engine switches from rendering sprite billboards to rendering the full 3D model).  The older way of rendering billboards required one to maintain a dynamic vertex buffer of the quads for the billboards, and to transform the vertices to orient towards the viewer on the CPU whenever the camera moved.  Dynamic vertex buffers have a lot of overhead, because it is necessary to re-upload the geometry to the GPU every time it changes, along with the additional overhead of uploading four vertices per billboard.  Using the geometry shader, we can use a static vertex buffer of 3D points, with only a single vertex per billboard, and expand the point to a camera-aligned quad in the geometry shader.

We’ll illustrate this technique by porting the TreeBillboard example from Chapter 11 of Frank Luna’s Introduction to 3D Game Programming with Direct3D 11.0.   This demo builds upon our previous Alpha-blending example, adding some tree billboards to the scene.  You can download the full code for this example from my GitHub repository, at https://github.com/ericrrichards/dx11.git under the TreeBillboardDemo project.

billboard