Using a Texture Atlas for Animation
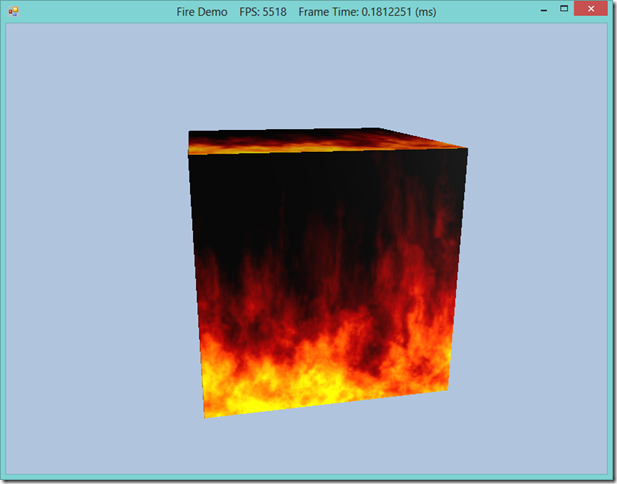
We’re going to wrap up our exploration of Chapter 8 of Frank Luna’s Introduction to 3D Game Programming with Direct3D 11.0 by implementing one of the exercises from the end of the chapter. This exercise asks us to render a cube, similar to our Crate Demo, but this time to show a succession of different textures, in order to create an animation, similar to a child’s flip book. Mr. Luna suggests that we simply load an array of separate textures and swap them based on our simulation time, but we are going to go one step beyond, and implement a texture atlas, so that we will have all of the frames of animation composited into a single texture, and we can select the individual frames by changing our texture coordinate transform matrix. We’ll wrap this functionality up into a little utility class that we can then reuse.
Animation Frames
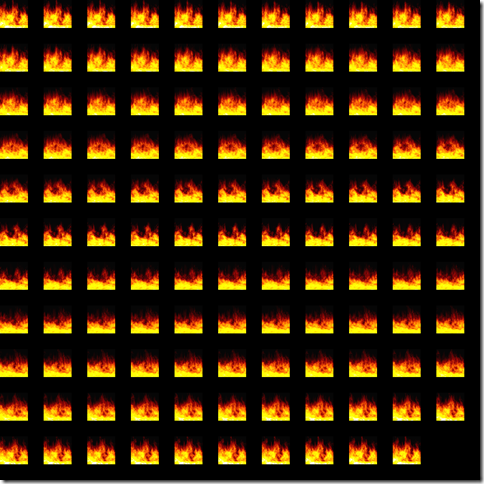
As part of the downloadable book code, Mr. Luna provides a fire animation consisting of 120 separate bitmaps, named Fire001.bmp – Fire120.bmp. Uploading each of these frames individually is easier, but less efficient, so we are going to compose them into a single texture and use that instead, varying our texture transform matrix to select the correct frame. The full fire animation as a single image is below:
TextureAtlas Class
public class TextureAtlas : DisposableClass {
    private bool _disposed;
    private readonly Matrix[] _texTransforms;
    private ShaderResourceView _textureView;

    public int Rows { get; private set; }
    public int Columns { get; private set; }
    public int NumCells { get; private set; }

    public ShaderResourceView TextureView {
        get { return _textureView; }
        private set { _textureView = value; }
    }

    public Matrix GetTexTransform(int i) {
        System.Diagnostics.Debug.Assert(i >= 0 && i < NumCells);
        return _texTransforms[i];
    }

    public TextureAtlas(Device device, ICollection<string> filenames) {
        …
}
    protected override void Dispose(bool disposing) {
        if (!_disposed) {
            if (disposing) {
                Util.ReleaseCom(ref _textureView);
            }
            _disposed = true;
        }
        base.Dispose(disposing);
    }
}
We will make our TextureAtlas class a subclass of our IDisposable base class, so that we can cleanly dispose of its texture reference using our Util.ReleaseCom function. Our class maintains the combined texture, which will contain all the frames of animation, and an array of matrices, which will contain the transforms that will map the UV texture coordinates of our mesh to the requested frame. We create the texture atlas by passing in a pointer to our Direct3D device and a list of filenames. Our constructor does the bulk of the work, so we’ll examine that in more detail next.
TextureAtlas Constructor
First, we will store the number of frames of that will make up our atlas. This will come in handy later on when we are looping over our frames. Next, we load the first texture file from the filenames parameter. We’ll grab the dimensions of this image, so that we can calculate how large our composite texture will need to be. Note that all of the textures passed in will need to be the same dimensions; mashing together disparately sized textures into a single super texture is possible, but is more complicated, so we will live with this restriction.
public TextureAtlas(Device device, ICollection<string> filenames) {
    NumCells = filenames.Count;

    // Note: all textures need to be the same size
    var tex = Texture2D.FromFile(device, filenames.First());
    var w = tex.Description.Width;
    var h = tex.Description.Height;
    tex.Dispose();

    // More...
Unless we are working with just a couple of textures, or very small textures, we are not going to be able to fit them all into a single strip. Now, it used to be (and I’m probably dating myself here…) that many graphics cards only supported texture sizes that were powers of two (256x256, 512x512, etc), or had shaky performance when using arbitrary texture sizes; however, nowadays that is not really an issue anymore, as graphics cards have generally moved beyond that restriction. The limiting factor these days is really the overall texture size, (8192x8192 for DirectX 10, bigger for DX11 cards). Still, it’s nicer to look at the combined texture if it is square, so I am going to lay out my animation frames in a square
Columns = Math.Min(8192 / w, (int)Math.Ceiling(Math.Sqrt(NumCells)));
Rows = Math.Min(8192 / h, (int)Math.Ceiling((float)NumCells/Columns));

System.Diagnostics.Debug.Assert(Columns * Rows >= NumCells);
After we’ve calculated the number of rows and columns that we will need in our final texture, we need to create the final texture, and blit each frame of animation into it. You could do this with Direct3D, but I found it easier to use the Windows Forms GDI API. It is probably a little bit slower, but this is a one-time initialization or loading-time operation, so we don’t need to be blazing fast, especially for an example. We also calculate the texture transform matrices as we draw each frame, using a scale to shrink the mesh’s texture coordinates and a translate to offset to the correct frame.
var bitmap = new Bitmap(Columns * w, Rows * h);
_texTransforms = new Matrix[NumCells];

using (var g = Graphics.FromImage(bitmap)) {
    g.Clear(Color.Black);
    var r = 0;
    var c = 0;
    foreach (var filename in filenames) {
        g.DrawImage(new Bitmap(filename), new Point(c*w, r*h) );

        _texTransforms[r * Columns + c] =
            Matrix.Scaling(1.0f/(Columns*2), 1.0f / (2*Rows), 0) *
            Matrix.Translation(c * w / (float)bitmap.Width, r * h / (float)bitmap.Width, 0);

        c++;
        if (c >= Columns) {
            c = 0;
            r++;
        }

    }
}
Lastly, we save the GDI Bitmap to a temporary file, and load it as a DirectX 11 ShaderResourceView.
var tmpFile = Path.GetTempFileName() + ".bmp";
bitmap.Save(tmpFile);

TextureView = ShaderResourceView.FromFile(device, tmpFile);
Implementing the FireBox Demo
Our demo application code is very similar to our CrateDemo. We simply need to create the TextureAtlas in our Init() function, and update to the correct texture transform matrix in our UpdateScene() function. We’ll loop the animation by modulus’ing our frame counter with the number of frames in the animation.
public override bool Init() {
    if (!base.Init()) return false;

    Effects.InitAll(Device);
    _fx = Effects.BasicFX;
    InputLayouts.InitAll(Device);

    _fireAtlas = new TextureAtlas(Device, Directory.GetFiles("Textures", "fire*.bmp"));

    BuildGeometryBuffers();
    return true;
}
private int i = 0;
private float _t = 0;
public override void UpdateScene(float dt) {
    base.UpdateScene(dt);
    // Get camera position from polar coords
    var x = _radius * MathF.Sin(_phi) * MathF.Cos(_theta);
    var z = _radius * MathF.Sin(_phi) * MathF.Sin(_theta);
    var y = _radius * MathF.Cos(_phi);

    // Build the view matrix
    var pos = new Vector3(x, y, z);
    var target = new Vector3(0);
    var up = new Vector3(0, 1, 0);
    _view = Matrix.LookAtLH(pos, target, up);

    _eyePosW = pos;

    // Update texture transform
    _t -= dt;
    if (_t < 0) {
        _texTransform = _fireAtlas.GetTexTransform(i++ % _fireAtlas.NumCells);
        _t = 0.05f;
    }
}
Other Applications
In addition to this type of frame-based animation, another common usage for a texture atlas would be for sprite sheets, either for ground and character tiles in a 2D game, or for small UI textures. In our example, where we are only drawing a single object which always shows the same frame of animation per drawing frame, we don’t really see the performance implications of combining the textures. If, however, we were drawing a number of objects that shared the same animation, we would see some speed up, as we could set the texture and incur the overhead of uploading the texture to the GPU once, and draw all the objects using the animation without switching textures.
Next Time
We’ll move on to the examples for Chapter 9 and investigate alpha blending, which will allow us to draw transparent and translucent objects.


