Thursday, November 13, 2014 Eric Richards

Well, it's been two rough months since the last post. Work has been crazy, and I've been wrestling with finishing up my never-ending Voronoi mapping project. So I decided to switch gears and return to the HLSL Development Cookbook. Now that I've got code in place to handle loading the .sdkmesh model files used by the book's examples, the hardest part is done. Now it is just a matter of converting plain HLSL vertex and pixel shaders over into the Effects Framework format I've been using, and porting the DXUT C++ code over to C# and my SlimDX application framework.

The first chapter of the HLSL Development Cookbook covers classic forward lighting, which is the style of lighting that we have used throughout the examples posted here thus far (see Directional, Point and Spot lights and three-point lighting). Later, the book covers some more complicated lighting schemes, but we'll get to that in due time.

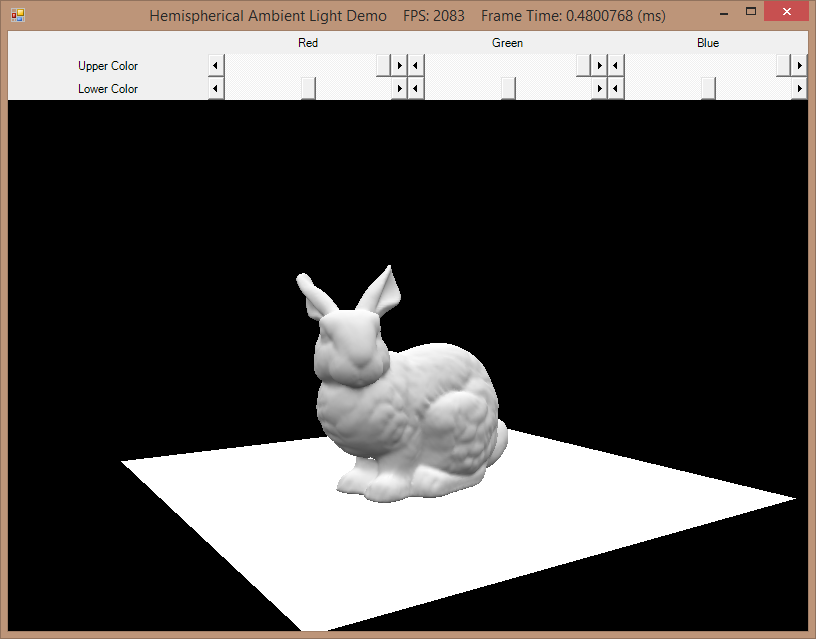
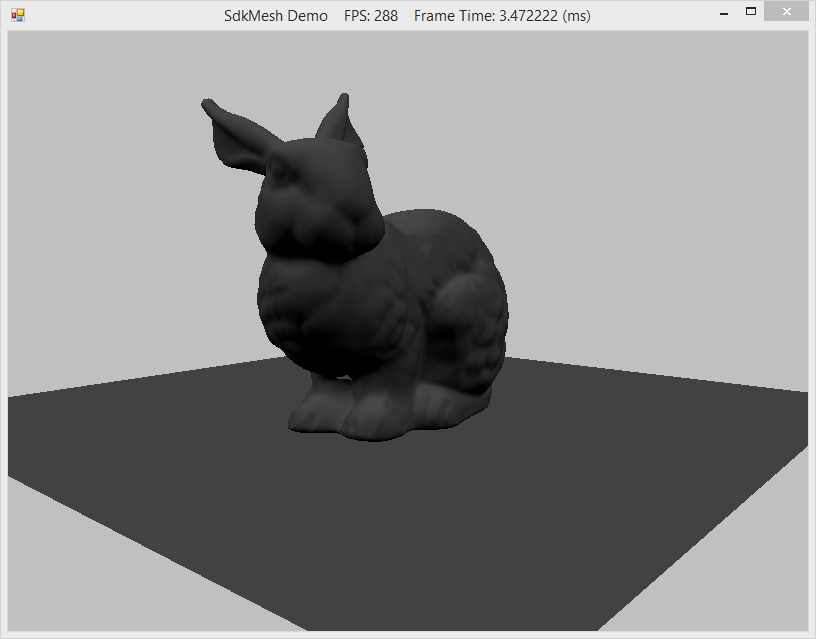
Up first on the slate is ambient lighting. If you've been reading along with my posts, you may recall that we briefly discussed ambient lighting when defining our Light and Material classes. Ambient lighting is something of a hack that was invented to fake the effect of indirect lighting (light that hits a surface after bouncing off one or more other surfaces) without having to actually perform the computations to model the light rays. Historically, back in the days before programmable shaders, this ambient lighting was expressed as constant color values for the lights and materials in the scene being rendered. So far, I have followed this simple scheme in the shaders I adapted from Frank Luna's Introduction to 3D Game Programming with Direct3D 11.0. As you can see in the screenshot on the left below, this method results in a flat ambient color, which conceals the surface details of the mesh. Combined with the diffuse and specular terms in the traditional Phong reflection equation, this method works well, but on its own it is underwhelming.

HLSL Development Cookbook presents an alternative method of calculating ambient lighting, called hemispheric ambient lighting. This method takes advantage of programmable pixel shaders, and allows us to calculate a varying ambient color per pixel, based on the interpolated surface normal and two constant color values representing the color of light that is bounced off the ground and off the ceiling/sky. As you can see in the screenshot on the right below, this lighting method preserves the surface details of the mesh (so long as different colors are selected for the top and bottom colors). As we'll see, this method of computing ambient lighting is also pretty cheap to do computationally.
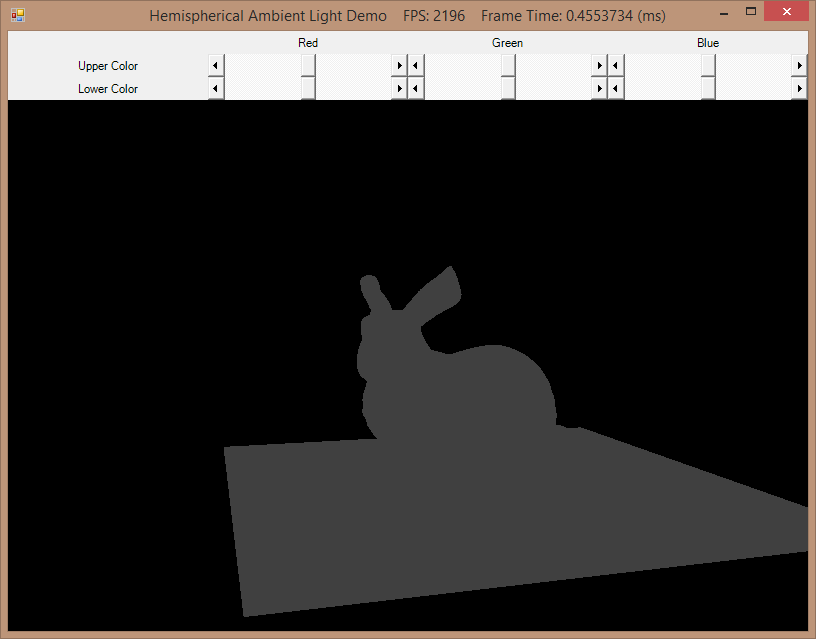
flat ambient lighting hemispherical ambient lighting
Old-style flat ambient lighting Hemispherical ambient lighting

As always, the full source code for this post is available at my github repository.


Thursday, September 11, 2014 Eric Richards

Many moons ago now, I picked up a copy of HLSL Development Cookbook by Doron Feinstein. I had intended to work my way through it after I finished up Luna's Introduction to 3D Game Programming with Direct3D 11.0, but winter and life kind of got in the way...

Another difficulty I had with this book was that the code samples made heavy use of DXUT which was the semi-official Direct3D sample framework. With the Windows 8 transistion, DXUT is sorta-kinda deprecated now, and besides, SlimDX doesn't really have support for it - SlimDX is more of a bare-metal binding to the underlying DirectX framework, which DXUT sits on top of.

So in any case, I was going to have to do a fair amount of rework to adapt the samples from this book to fit into the framework of code that I'd built up over the past year or so. Swapping the UI related stuff out for WinForms controls hosted in my SlimDX app didn't seem as though it would be that hard, but a bigger stumbling block was the fact that all of the sample meshes provided with the code used the .sdkmesh format. SDKMesh is a 3D model format that used to be used in a lot of the DirectX sample code, after .X models kind of fell into disfavor (Of course, now it appears they are using yet another model format, .CMO). SDKMesh is unfortunately not supported by Assimp, so I can't use Assimp.Net to load SDKMesh meshes. Fortunately, it is a relatively simple binary format. The documentation, at least that provided in the DirectX July 2010 SDK, is a little spotty, and not totally correct, but its possible to figure things out by looking at the source code for DXUT and another C# SDKMesh loader that appears to have disappeared from the internet since I first found it...

Well, this has sat in my todo pile for long enough, let's get started. As always, you can get the code for this example from my public GitHub repository.

stanford bunny skdmesh


Saturday, July 26, 2014 Eric Richards

Unfortunately, I've been busier than expected with work stuff, so my free time hasn't been very abundant. It's looking like I'm going to be porting the Pidgin Sip plugin's Sip stack to c#, since the Microsoft UCMA Sip library isn't really compatible with Office365. The existing options for libraries to do this don't seem to be very suited to handling the Lync-specific SIP extensions... :-(.

Hopefully, more Voronoi work should be coming up next week, so I'll have some material for a real post.

In the meantime, I did find some time to work on the new website today.

Comments are back, although I haven't imported the old Blogger comments to the new format yet. Those may turn up tomorrow if I get ambitious... Parsing them out of the Atom export is not hard, it's just kind of tedious.

I've also hooked up a new RSS/Atom feed. You should now be seeing a link in the top-right corner that will let you subscribe to any new posts via feedburner. Any existing subscriptions should also work now - I've got things setup so the old feed url should point to the new feed as well, thanks to Sean McAlinden's helpful post. Looking over the logs for the last week, it looks like some of you are actually subscribed to my site. I had thought that it was just the service that cross-posts my new posts to Facebook.


Saturday, July 19, 2014 Eric Richards

I've decided to move my blog off of Blogger. Blogger was great for getting started, but it has just become too painful to fight with going forward. I'm sick of fighting the Blogger templating to force it to display my content the way that I want it to. Blogger has a habit of absolutely mangling the html that I try to post. For posts consisting mostly of plain-text and images, this is not that big a problem, but I have to spend a ton of time trying to get code-heavy posts to render in a readable way. Over the last year, I've spent far more time tweaking my posted html to get it right than it has taken me in the last week to write a home-rolled blog engine for this new site to use, even counting extracting my existing content out of Blogger and converting it into a new format.

Beyond that, there are a number of things that I would like to do going forward that I simply cannot do easily with Blogger, but I can do very easily if I have control over the site. I'm far more comfortable writing html, javascript and server-side code than I will ever be at bending Blogger to my will.

I'm sure there will be some speedbumps, but I think this is a much better solution for me, and ultimately, for you, readers. I'm nowhere near finished, but I think I've got the essentials ironed out, so I'm going to go ahead with the switch-over.

Things that should still work:

  • Existing links to my page should still be valid, at least for content. I've put in quite a bit of effort trying to get the old-style Blogger urls to play nicely with my new site
  • All of the old content has been imported.
  • Images should still be fine, since those were all externally hosted and I haven't swapped those out yet. Eventually, I'd like to serve all my screenshots locally, so I can convert them to jpegs so pages will load faster (most are loss-less PNGs right now).

Things that are broken

  • Comments are disabled for the moment. Extracting the primary content from Blogger was enough of a pain, so I haven't bothered with the old comments yet. I also need to add server-side support for comments. If you have any questions about any of the tutorials in the meantime, at the top of each post is a link with my name that will allow you to send me an email. I'll try to get back to you as quickly as I can.
  • Rss feeds - From my analytics, I don't think anybody actually used the blog feed that Blogger provided, but I'm not going to bother with implementing one for the new site unless there is some demand or I have some spare time and get inspired.
  • Some of the older posts might look a little wonky. I'm going through them as I have time and making sure that the content I extracted from Blogger renders decently, but it is time-consuming. Particularly some of the oldest posts, when I was still using the online Blogger editor, before I standardized my workflow on Windows Live Writer, may be a little bit off.

Thanks for bearing with me. If you notice anything unusual, feel free to send me an email, it would be very helpful in pinpointing issues.


Monday, July 14, 2014 Eric Richards

For the last six or eight months, off and on, I’ve been trying to write some code that will create a Voronoi diagram from a set of random points, inspired by Amit Patel’s Polygonal Map Generation demo.  In the last week or so, I had a bit of a break-through, in that I finally managed to get an implementation of Fortune’s Algorithm put together that would actually work and generate the Voronoi edges and vertices correctly so that I could render them.  Since most of the existing implementations I’ve been trying to work from are either broken or an enormous pain in the ass to try to understand, I’m planning on writing up my implementation, once I’m finally happy with it.  I’ve still got a fair way to go, since right now I’m only outputting the graph edges and vertices successfully, and while that renders prettily, I haven’t gotten to the point that I have all of the really useful graph connectivity information being output yet.  Hopefully, if everything goes well, I’ll manage to finish that up by the end of the week, but this has proven to be a real bugger of a problem to solve.

As I mentioned, most of the implementations I’ve studied are either incomplete or broken.  Particularly, I haven’t found an example yet that correctly clips the edges of the generated Voronoi polygons to a rectangular area.  So long as all you care about is rendering the graph to the screen, this isn’t a big problem, since most 2D graphics libraries will happily draw lines that extend beyond the drawable area of the screen.  However, if you’re trying to subdivide a rectangular region into Voronoi polygons, its kind of nice to have your edges actually clipped to that region.  What I’m envisioning doing with this code eventually is using it to render 3D maps, subdivided into territories, but with an overlaid rectangular grid for moving units – think of the strategic map in Total War games or Lords of the Realm. 

After I got frustrated with trying to make the broken clipping code I was working from perform correctly, I trolled Google and came across the Cohen-Sutherland line-clipping algorithm.  This looked to be exactly what I needed, and wonder of wonders, the Wikipedia page actually featured a readable, reasonable example, rather than the obtuse academic pseudo-code you usually find there (see the Fortune’s Algorithm article…).  The only thing I would caution you about with the Wikipedia example is that it uses a coordinate system where the origin is the lower-left bounds of a rectangle as usually encountered in mathematics, rather than the upper-left origin we commonly use in computer graphics, so some tweaking is necessary.

The code for this example can be downloaded from my github repository, at https://github.com/ericrrichards/dx11.git.  The algorithm is included in the Algorithms project, while the example code is in the CohenSutherlandExample project.  The example code is a quick-and-dirty mess of GDI drawing code, so I’m going to focus on the algorithm code.

image

After clipping:

image